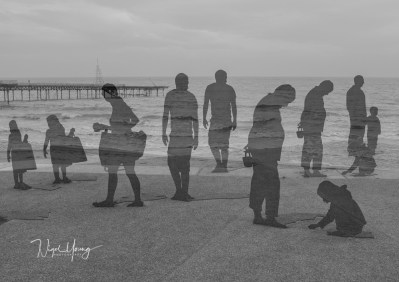
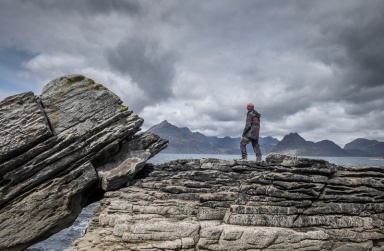
London Eye – Fuji 50-140mm
A combination of illness and family commitments means my Fuji cameras haven’t seen much action over the last month or two, but a couple of weeks ago I was booked on a Light and Land ‘Impressions of London’ workshop with Valda Bailey (Twitter – @tanyards) and Doug Chinnery (Twitter – @dougchinnery) and really didn’t want to miss it. Although I have been taking photos for over 50 years, and feel pretty confident with landscape and urban subjects, I’ve sensed my photography was in something of a rut lately and wanted to try a different approach. So off I headed to London, slightly intimidated by the joining instructions that stated that tripods were not allowed and would be ‘thrown in the Thames’! The reason for this became obvious fairly quickly – this workshop was all about experiencing different techniques like Intentional Camera Movement (ICM), Multiple Exposures and Zoom Pulling, and without the ‘straightjacket’ of a tripod, and the front-to-back sharpness that most photographers are programmed to produce, there would be ample opportunity for creativity and abstract impression. And, boy, was it a different experience!

Tate Modern Café – iPhone 6
From the outset, it was clear this was going to be a great day; the weather was kind – mainly sunny with cloudy intervals; the location was great – the South Bank near Tate Modern; Doug and Valda were great tutors, and it was a small but enthusiastic group, keen to learn new techniques. After our initial briefing, where it became obvious that my Fuji X-T1 would have some shortcomings (more on this in a moment) we all worked individually to try and capture images that broke all the conventional rules, but still worked.The instructions were clear – experiment, take lots of photos, look for unusual angles, textures, colours and combinations. Try to build up images from different elements that complimented one-another in some way. Overlay patterns and abstracts on defocussed main images, and think about how images could then be further worked on via post-processing.
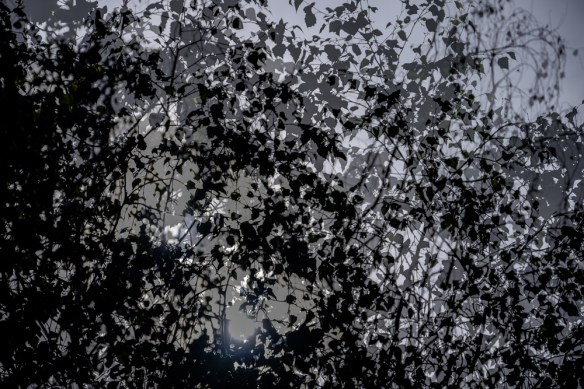
Trees, South Bank – Fuji 16-55mm
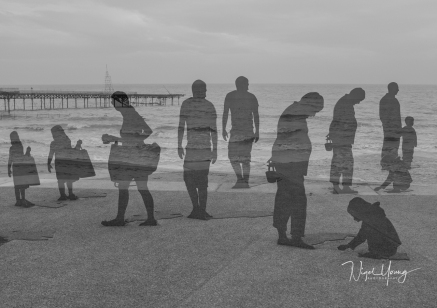
So the start point for me was multiple exposure images and this is where the limitations of Fuji cameras compared to Canon and Nikon DSLRs became apparent. Some of the Canon cameras can take up to 9 shots to create a single image. Not only that, but each is created as a RAW file, the individual shots making up the image can be saved individually, and there are multiple modes for blending the images together (like the layer blend modes in Photoshop). The Fuji cameras (X-T1 and XT10 anyway) are much more simplistic – only 2 exposures, a single ‘general’ blend mode, and the only image saved is a JPG of the multiple exposure itself – no original files to go back and have another go with at home… Although this was clearly limiting on the day, I did nevertheless manage several multiple exposure images I was pleased with. Maybe more sophisticated multiple exposure options could feature in a future Fuji firmware upgrade?

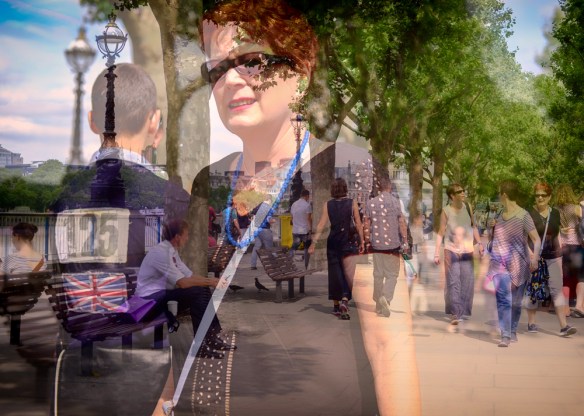
Millennium Bridge – Fuji 16-55mm
Next was Zoom Pulling – twisting the zoom ring during a shot. I found that exposures around 1-3 seconds worked best for this technique – too short an exposure meant there was little effect, while too long an exposure meant all detail was lost. This is a pretty well known and often over used technique, so to my mind needs to be used with care. First time I think I’ve used it though, and some interesting results, especially with quite bold subjects.

South Bank Apartments – Fuji 50-140mm
Intentional Camera Movement (ICM) is exactly that – moving the camera side to side, up and down, backwards and forwards, or twisting it, all during the exposure. This can create weird and wonderful shapes, with these images used alone, or as part of a multiple exposure final image. One interesting thing I found was when using my 50-140mm lens with the image stabilisation switched on. During exposures of 2-3 seconds, providing the camera was not moving too quickly the IS would ‘lock on’ several times during the shot, giving the appearance of a multiple exposure – quite a pleasing result in some cases.

Golden Jubilee Bridge – Fuji 50-140mm
These techniques (and Valda is a master) are becoming popular, as evidenced by the fact that this month’s UK photo press are carrying a couple of articles about it, so its definitely here to stay. We were of course mainly shooting architecture and urban views, but I can see it would work equally well with landscapes, nature and even macro. What is rather good is that you don’t need to carry a complete bag of gear (as I did!) to capture these images – a mid range zoom lens is sufficient, and no real need for the highest resolution sensor either. I did find that switching filters to get the correct long exposures during changeable light was tricky – I think a variable ND filter would probably be quite helpful here.
So, I have several hundred images from the day – a few of which I am happy with as they stand, and a good number that can be worked on, either individually or combined in Photoshop. I can’t wait to get out and try these techniques again – its not often you learn something new after 50 years of doing pretty much the same thing!
Thanks to Doug and Valda (and Light & Light for their great organisation) for a super day out, and a new creative angle for me to further explore!
South Bank – Fuji 35mm f2


 So a fail all round, and the stabiliser, while a nicely engineered item with some good features, will be going back. Regardless of the fact that it isn’t as portable as I’d hoped, something unreliable and that drains the battery in the phone is never going to work for me. I think I may try just a simple


 Although I have some reservations about using my Olympus Micro-Four Thirds (MFT) cameras for landscapes, one area where they come into their own is fast action photography like motor sports. The sensor on all MFT cameras is just one quarter the size of a so-called full frame camera, and although they can still deliver file sizes based on up to 20Mpx, the individual pixels are so-much smaller, so suffer from noise in low light or high contrast situations and this does limit things somewhat, in my opinion. MFT cameras do have a couple of particular advantages though, especially for action photography – the small sensor means that a given focal length lens is equivalent to a lens twice as ‘long’ as one fitted to a full frame camera, and for any given aperture will have a much greater depth of focus. So, in practical terms, the same ‘spec’ lens on an MFT camera will bring things in much closer, and more of the subject will be in focus.
 My camera, the Olympus E-M1 mk2, has one other killer feature – ProCapture. Whereas most cameras will focus on the subject when you half press the shutter, and then take one or more photos when you fully press it, Pro Capture starts recording as SOON as you half press the shutter, and ‘buffers’ or keeps the last 12 shots in its memory together with all those after you press the shutter, and these are then written to the memory card. So if you are shooting at one of the lower speeds, like 5 frames a second, you will get a couple of seconds worth of images BEFORE you make that final press of the shutter. How many times have we been looking through the viewfinder waiting for action to happen, like a bird taking off, but by the time we react to the movement, the bird has gone. This camera lets you go back in time!
 So last weekend I spent some time at a club motor race meeting at Oulton Park in Cheshire with those nice folks from Olympus UK Events. I already had my E-M1ii of course but was pleased to try both a 40-150mm Pro lens, and the 300mm f4 Pro lens (they were loaning out cameras too if anyone wanted to try those). A great opportunity to ‘try before you buy’ given that the 300mm lens is around £2000 to buy. Also on hand to help were Lewis Speight, one of the technical gurus from Olympus UK, and Mike Inkley, a pro sports photographer. So off we went trackside to record the cars that were racing that day – some modern sports/touring cars, but some classic sports cars too.
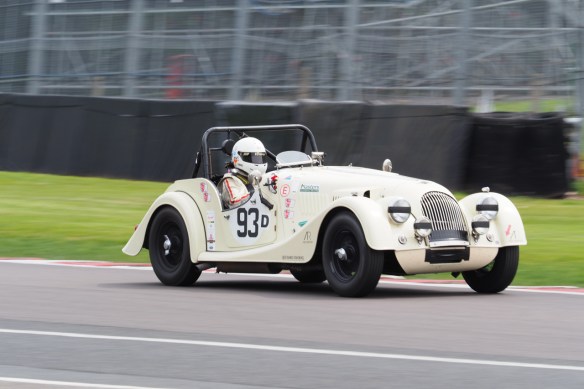 Lets just say that the equipment we were using was amazing – the ability to fill the frame and focus on fast moving cars from the other side of the safety barrier, and record bursts of up to 40 shots as the cars went past or crested the top of the hill at Lodge Corner! I did however fill a complete memory card during my morning session – over 3000 images – so needless to say sorting through these and picking the best from each sequence took some time!


 An amazing day, and one that completely surpassed our expectations. Roll on tomorrow, and Part 2!


 Both books are very helpful, and indeed I do use both of them. The E.Bowness publication is a handy, pocket-sized book – just 107 pages in total, well illustrated, with useful suggestions of locations, grid references for parking etc. It covers the most popular photo locations, and has a very neat index at the back that not only lists all these locations, but grades them by type, level of photo interest, distance from parking and difficulty of access. Its not that detailed a book, but handy nevertheless – I’ll often use it when planning a trip.